
2D Chamfer Fusion 360 Manufacture Training
2D Chamfer Toolpaths - Fusion 360 Fundamentals #2 Winston Moy 89.6K subscribers Subscribe Subscribed 209 Share Save 8.3K views 5 years ago A basic example of 2D chamfer toolpaths in.

2D Chamfer Fusion 360 Manufacture Training
The 2D Chamfer is used to create a beveled edge on the part. Select from Edges or Sketches. A tapered tool is required.. To accommodate this, Fusion 360 approximates spline and surface toolpaths by linearizing them; creating many short line segments to approximate the desired shape. How accurately the toolpath matches the desired shape.

Solved 2D Chamfer coming to Fusion 360 Autodesk Community
Autodesk Support Oct 8, 2023 Products and versions covered Issue: Which operation should be used to create a chamfer when milling in Fusion 360 or Autodesk HSM CAM? Causes: There are multiple ways to Manufacture a chamfer depending on how the model is set up. Solution:

Speedy Fusion 360 Ep. 11 2d Chamfer YouTube
Oct 8, 2023 Products and versions covered Issue: How to get best results for deburring/edge breaking/chamfering a model's geometry/edges in Fusion 360 Manufacture. 3D geometry: Varying 2D Geometry: Solution: For 3D geometry: See: QUICK TIP: How to machine 3D chamfers Create a Flow, Scallop, or Morph toolpath.

Fusion 360 2D Chamfer Fazowanie Programista CAM
Option one: Uncheck the chain selection in the chamfer tool settings window and select every edge individually. Option two: split body and draft tools Option three: sweep cut, with "path + surface guide", several times, on every edge with the "tight radius" transitions (that's why chamfer tool doesn't work). 3. OrangesRevolt.
2D Chamfer toolpath does not go around entire perimeter of selected contour in Fusion 360
In this Fusion 360 tutorial we're going to learn how to use the Fillet and Chamfer tools to bevel and round off edges. We'll use them on edges of box, cylind.
2D Chamfer toolpath generates unnecessary retracts on a hole and avoids sections in Fusion 360
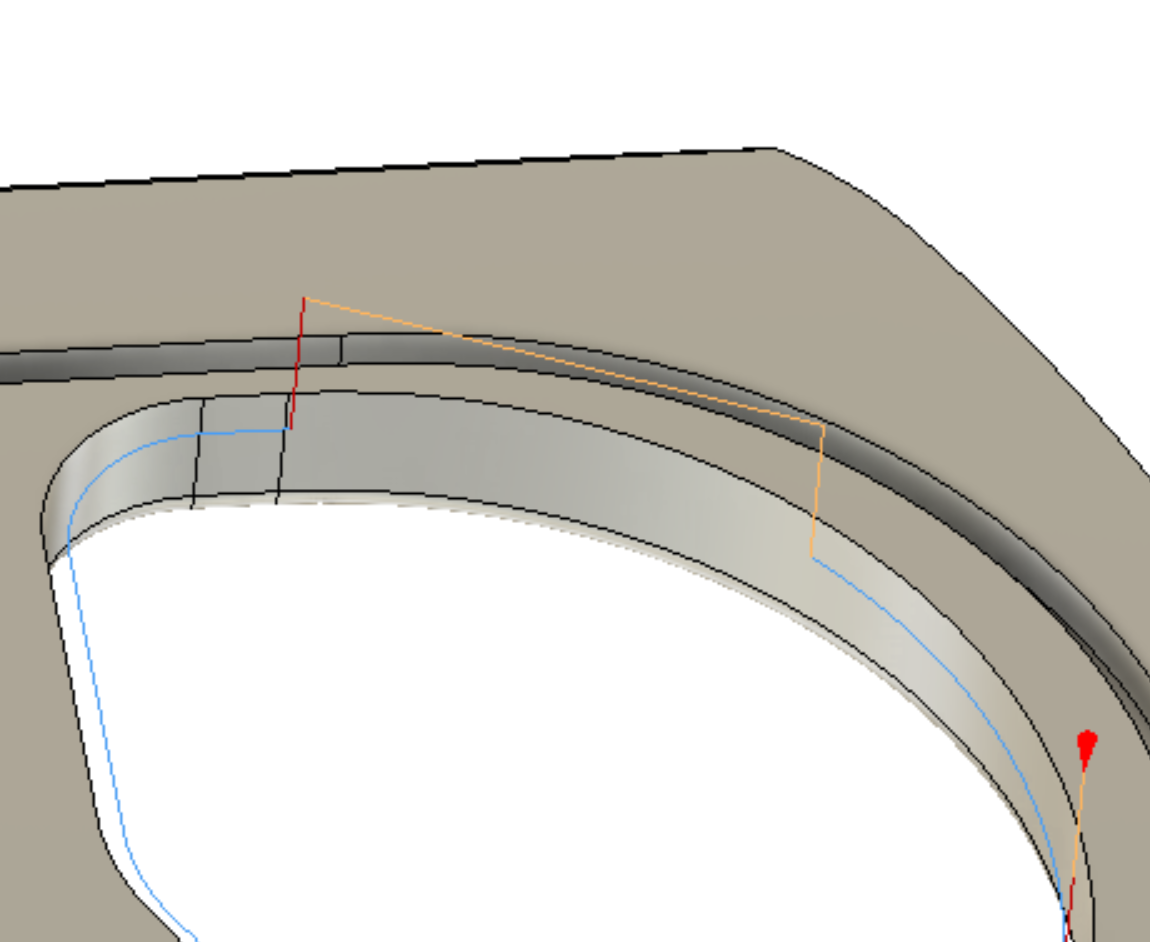
Oct 29 Written By Barrett Smith Recently I found myself with the issue of needing to chamfer a part feature, but I couldn't reach it with the traditional chamfering approach. So I dug into how to get Fusion360 to make back (backside, bottom chamfering, etc.) chamfers. And unfortunately, it's not simple or straight forward.
Not all selected edges have toolpaths generated for 2D Chamfer in Fusion 360
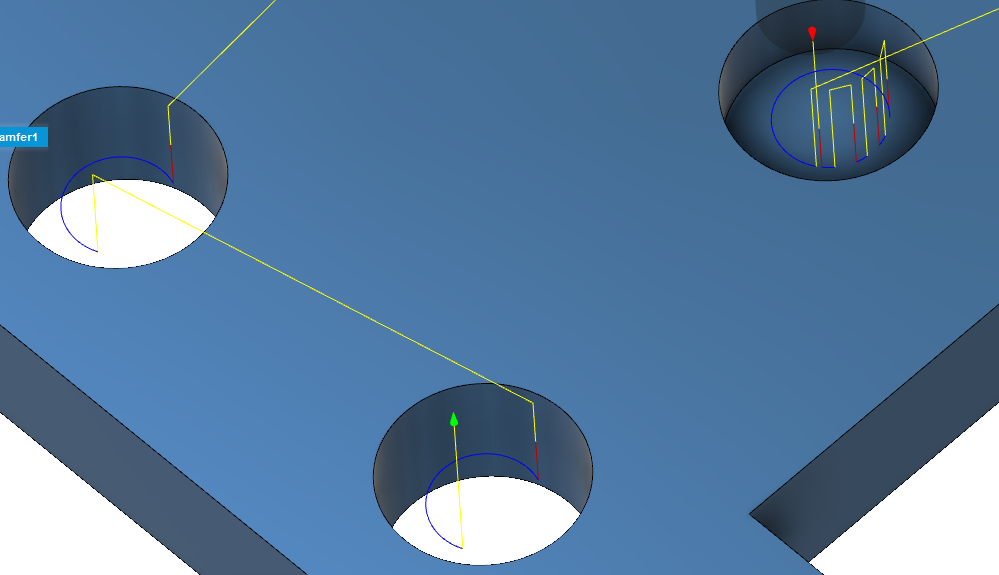
Fusion 360 freezes while selecting the open contour under 2D chamfer. Solution: Heights In the Height tab, make sure that the Bottom Height is from "Selected Contours" and the Offset is set to 0.0. Note: 2D Chamfer toolpath is for chamfers that are not modeled.
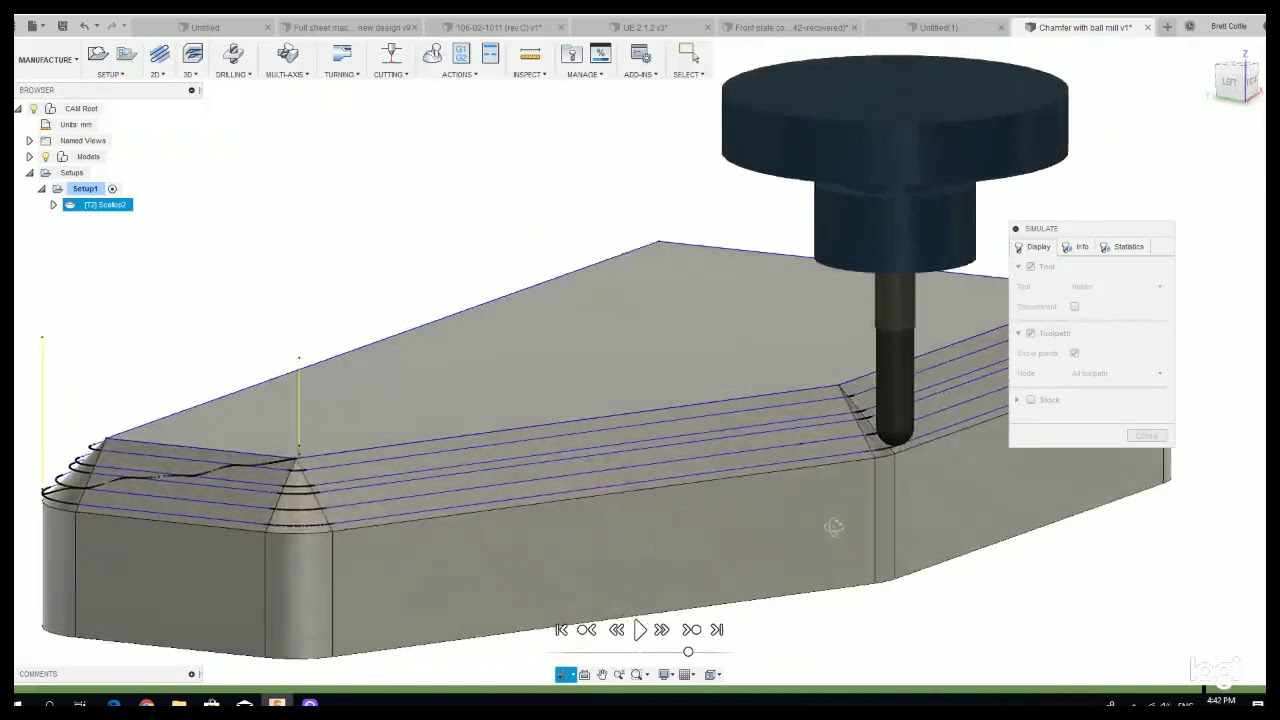
Fusion 360 Chamfer with a Ball Mill (previously live) YouTube
How to use 2D chamfer to mill two edges in one pass in Fusion 360 Manufacture, Inventor CAM, and HSMWorks. 2D Chamfer does not allow a cut directly on the line unless the tip diameter is 0. Use a trace operation with a chamfer tool to create a chamfer on two sides of a channel: Create a sketch in the center of the channel on the top face of the edge that will be chamfered.
Fillet & Chamfer Tools in Fusion 360 YouTube
Autodesk's Fusion 360, Inventor CAM and HSMWorks have some great options in 2D Contour and 2D Chamfer for creating toolpaths that machine chamfers onto parts or two deburr sharp edges. However, there's no specific toolpath that allows you to easily do the same for edges or chamfers on the underside of features and parts. Luckily you can take advantage of the vast swathe of parameters.

Fusion 360 CAM lavorazione smussi (2D Chamfer) YouTube
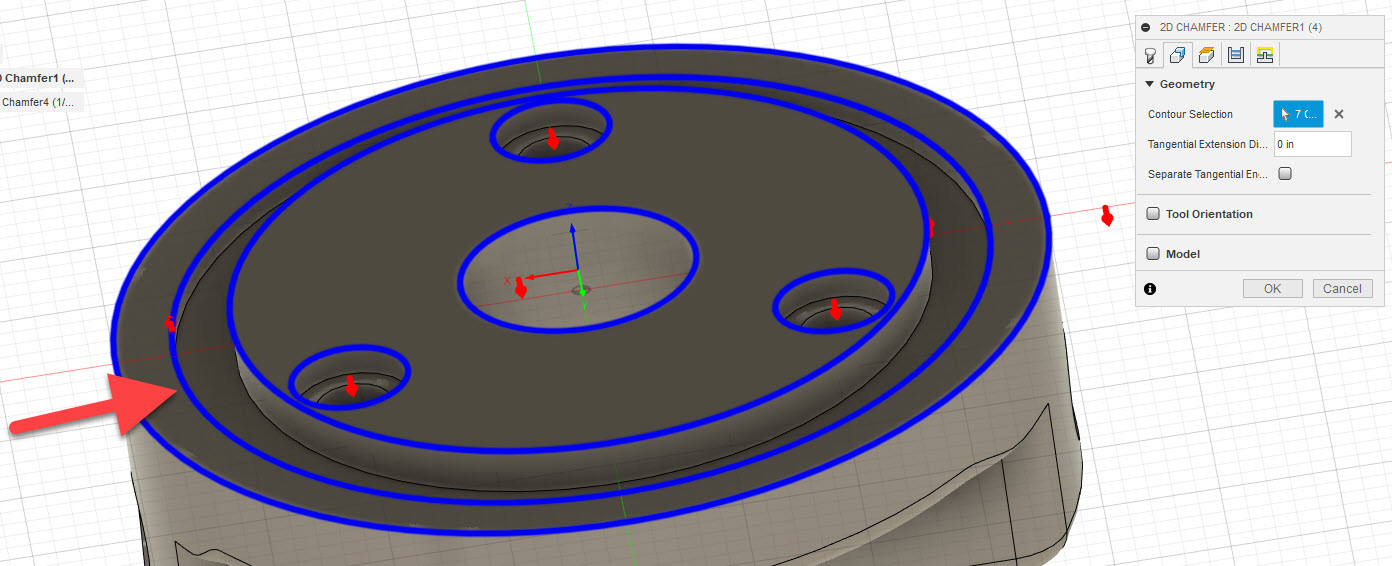
Reference 2D milling toolpaths 2D Chamfer 2D Chamfer The 2D Chamfer is used to create a beveled edge on the part. Select from Edges or Sketches. A tapered tool is required. Select the sharp edge on a part without modeled chamfers. If the Chamfer is modeled, select the lower edge of the chamfer. Sharp Edge Selection. Modeled Edge Selection.
chamfer highlight Fusion 360 Blog
Fusion 360 Help | Generate a 2D Chamfer toolpath | Autodesk Manufacture How to Generate 2D machining operations 2D Chamfer Generate a 2D Chamfer toolpath On the Manufacture workspace toolbar, click Milling > 2D > 2D Chamfer. The 2D Chamfer dialog opens. On the Tool tab, click Select to pick a tool.

fusion360fazowanie2dchamfer04 cadcamlessons
Oct 8, 2023 Products and versions covered Issue: How to extend a 2D toolpath (ex. 2D Contour, 2D Chamfer, etc.) so the tool cuts further past the selected contour chain in Fusion 360. For example, extending the cut past the stock boundary. Solution: Edit the contour chain (click the gear icon) to add an Extension.
Fusion 360 Chamfer Toolpath Options YouTube
Fusion 360 offers a couple of different methods to add a chamfer to your part. We'll look at a couple of CAM chamfer options that work best depending on if your part has the chamfer.

Fusion 360 How To Chamfer Guide Update V 2.0.915 YouTube
Fusion 360 Help | 2D Contour | Autodesk Manufacture Reference 2D milling toolpaths 2D Contour 2D Contour 2D Contour allows you to machine profiles. The machining area can be selected from Edges, Sketches or a Solid face. Typically a finishing operation, but Contour can be used to take multiple cuts. Manufacture > Milling > 2D > 2D Contour

2D Chamfer Another way Fusion 360 cadcamlessons
2D Chamfer Fusion 360 Chamfering is a simple milling operation, but significantly affecting the appearance and functionality of the finished part. By bending sharp edges during milling, we shorten the time of manual finishing.